

Table of contents
How to design your own sauna online in 4 easy steps
The perfect DIY sauna is now easy accessible with this handy online App. The TyloHelo 3D sauna designer is the first step to building your own home sauna room. The configurator tool consists of 3 main sections with a summary at the end for you to download a pdf of your specifications.
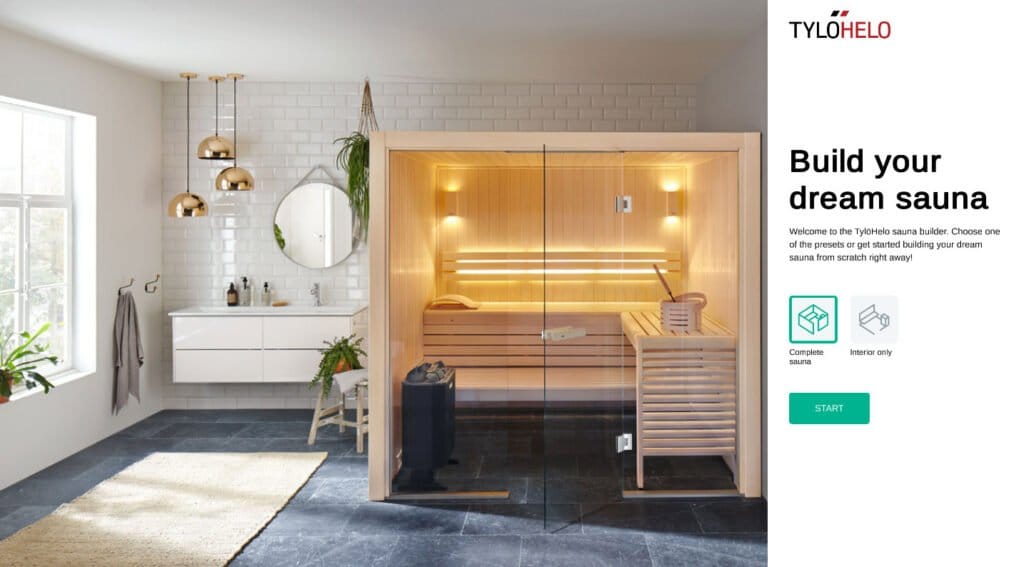
Screenshot: Start screen of the TyloHelo 3D sauna configurator
Step 1: Size of your sauna room design
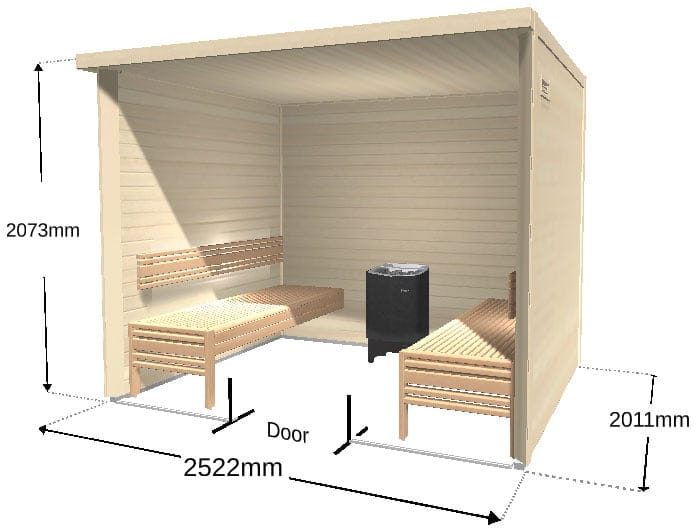
The size of your sauna will of course be dictated by the space you have available. When you begin the sauna designing process there will be minimum standard sizes applied of 2011mm x 2011mm x 2073mm. This is easily editable, however the smaller you go, the less chance there is for interior furniture such as benches and accessories.
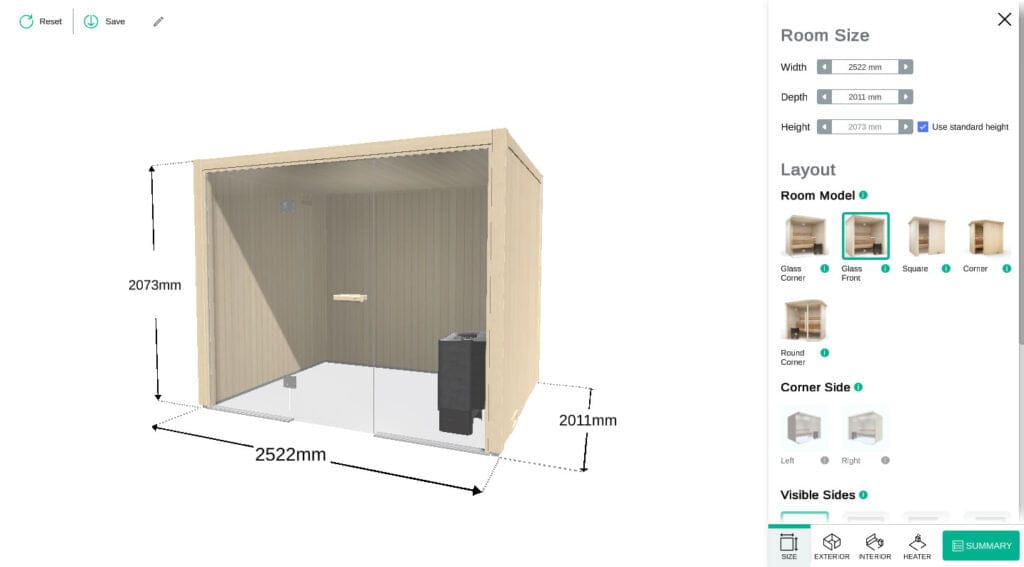
Screenshot: Measure up your sauna space and enter the details into the room size option
Room size
When you design your own sauna with the App you will first need to measure the space. You’ll also need to consider access points for ventilation. Additionally, you’ll need to leave breathing space between the walls of your home and your sauna when you build it.
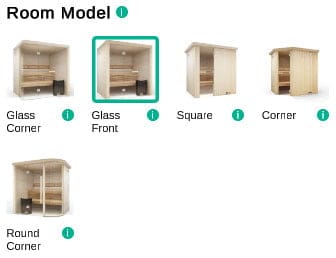
Room model
For room model we’ve chosen the glass front specification. Other options for your sauna room design include glass corner, square, corner and round corner. Your choice will be down to aesthetic preferences. You can experiment with the design before you progress to the next part.
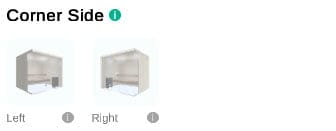
Corner side
If you choose a glass corner you can also choose which side the corner is to go on. Since we’ve chosen a glass front this isn’t applicable.
Step 2: Exterior design of your sauna room
At this point you will be ready to move on to the exterior design of your sauna. This will cover an extensive array of building components such as wood type, glass tinting, soffit installation, trim and frames.
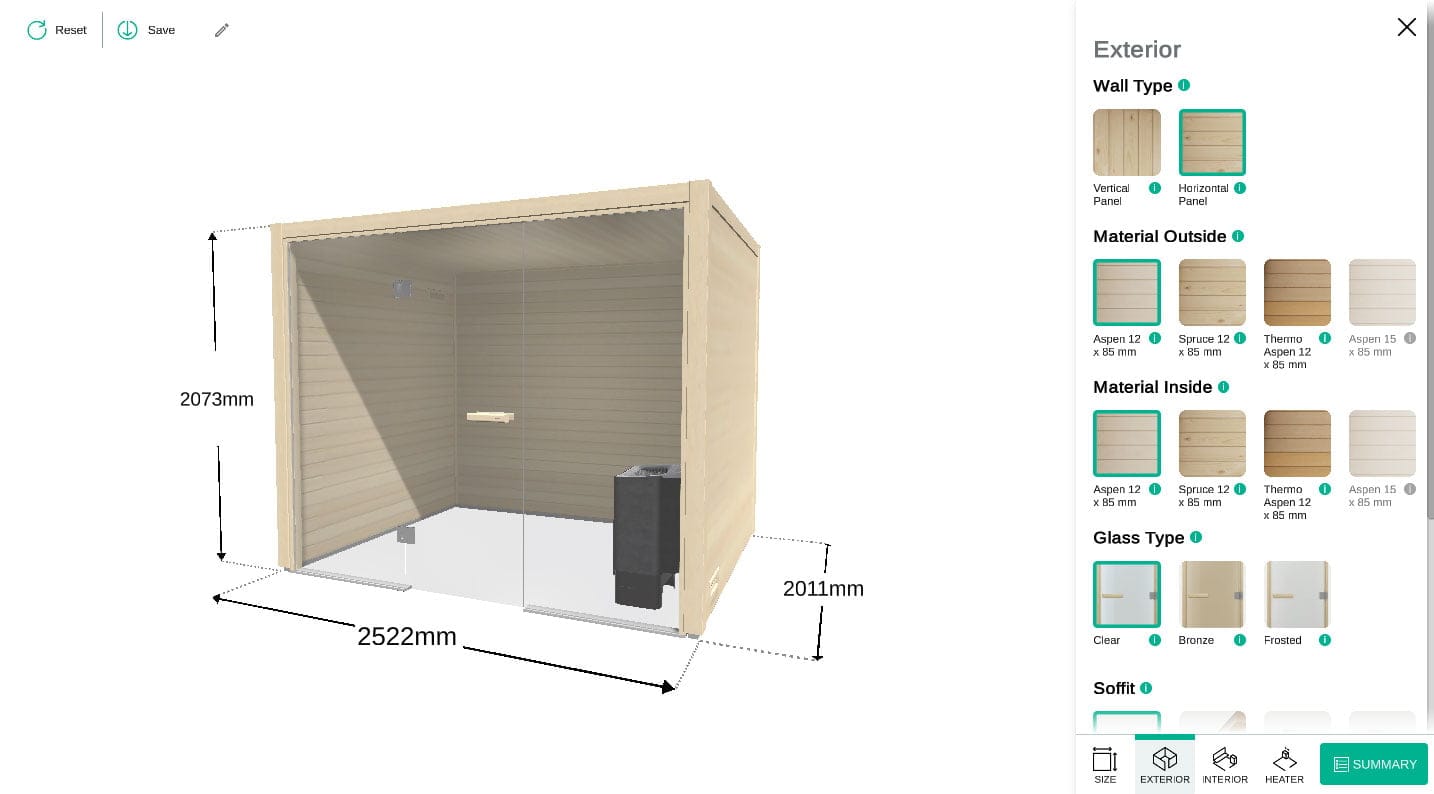
Screenshot: It’s now time to design the exterior of your new sauna room
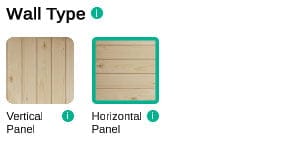
Wall type
Choosing between horizontal or vertical wood panelling can be a difficult choice for some people. This where you make that decision.
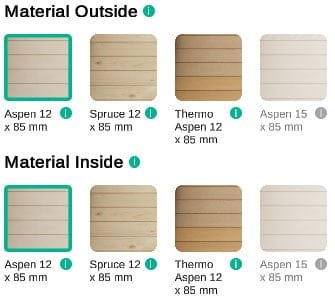
Material outside
Next up is the choice of wood panelling for your sauna. Different woods can offer a remarkable different sauna experience. Hard woods such as usually have a deeper aroma, darker colour and are more expensive. Softer woods such as Alder, Aspen or Spruce are less expensive and lighter in colour. Consequently, TyloHelo offer a compromise in the Thermo treated Aspen.
Material inside
For inside we’ve chosen the same Aspen panelling purely for aesthetic purposes.
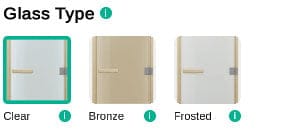
Glass type
If as we’ve done you choose for a glass front sauna you can also choose which glass you have. This is the same if you just choose to have a simple glass door. Choices are clear, bronze tinted or frosted glass. All glass is tempered safety glass as standard.
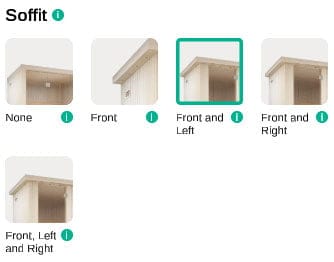
Soffit
Whilst not as widely used as it once was, the soffit can also be used to house downlights. As a result it is still widely used for outdoor saunas.
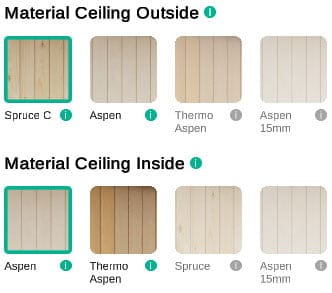
Material ceiling outside
In the whole it’s rare that anyone will be admiring the external ceiling of your newly designed sauna. Consequently you can cut a few corners here and go for a cheaper wood such as Spruce if you’ve used a hard wood elsewhere.
Material ceiling inside
For inside we will again go with Aspen which we’ve used everywhere else to maintain the aesthetic.
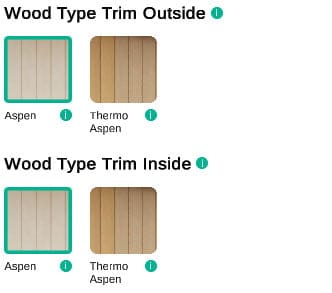
Wood type trim outside
For wood trim your previous choices will usually dictate what you choose here. You can of course experiment with the sauna design before settling on your final choice.
Wood type trim inside
For inside trim we will choose the same as outside.
Floor frame
For the floor frame we’ve chosen the basic option.
Step 3: Interior design of your sauna room
As this is where you’ll be enjoying your sauna most you will want to make the experience as comfortable as possible. We would advise to keep it spacious where possible so you are not too near the heater or there is no room to move.

Screenshot: Choose an interior layout that will give you plenty of space to relax
Bench layout
You’ll need to sit when enjoying your sauna and the most popular method is the bench. TyloHelo have included a range of sauna bench designs and layouts. The layout shown in the design is a bench on each side of the sauna room.
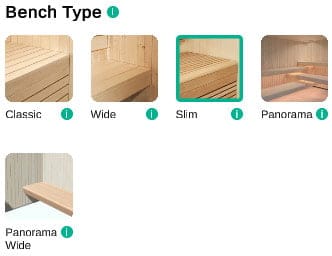
Bench type
The type of bench is essentially the design of the slats. For this example we’ve chosen the slim type. You can read more and view images for the available designs of sauna bench here.
Bench material
For materials we’ve again gone for Aspen.
Bench front
We chose a soft edge, however you can also choose a straight-edged design.
Backrest
This is where your design skills really pay off. It might be a good idea to consult with a professional on aspects like backrest choice or even whether to have a backrest. Keep in mind this needs to help you relax as much as possible.
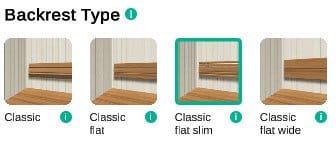
Backrest type
Choose from classic, classic flat, classic flat slim, classic flat wide and more. There is no popular choice for the type of backrest to have in your sauna, it is a matter of personal preference.
Backrest lighting
Now it’s time to start creating that all important ambience. The perfect sauna needs to be perfectly lit. Soft lighting around the room can greatly enhance the experience. In our example we added backrest and bench lighting.
Skirt layout
For skirting layout we went with the first choice.
Skirt type
We also went with the first choice for skirt type.
Bench lighting
We added under bench lighting for the perfect ambience.
Step 4: Heater for your sauna room
In the sauna design App you are only presented with a few sauna heater options. In this regard TyloHelo have attempted to keep things simple. If you contact us we can offer you an extensive range of alternatives that will be perfect for your room.
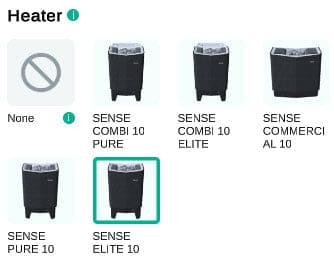
Heater
In our example we’ve chosen the Tylo Sense Elite 10 which is ideal for most home saunas and works in conjunction with the Tylo Elite Cloud wireless control panel. We also have a vast array of home sauna heaters which can replace the heaters shown.
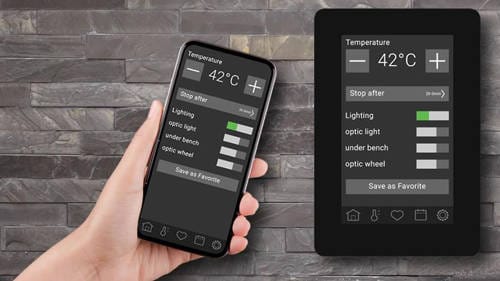
Control panel
Although not shown, you can also wirelessly control your sauna experience with the Tylo Elite Cloud control panel. Most notably, there’s also an accompanying smartphone App so you can fire it up from anywhere in the home or on the go.
Step 5: Summary of your sauna room
One you’ve completed the steps you will need to download a pdf of your final specifications. This is a summary of your requirement which we will need to provide you with a price.
Download an example specifications document
Purchasing your sauna
Using your specifications document we will provide you with delivery timescales, a price for parts and delivery or parts, delivery and installation. Leisurequip are the only trademark approved dealer / installer for TyloHelo in the UK. As a result you can expect 38 years of industry expertise, on-going technical assistance and very competitive pricing.


