DIY home sauna
Learn about what it takes to build your own sauna at home with this DIY sauna kit guide
If you’re handy with a few tools and want to keep your costs down you may want to consider building your own sauna from a kit. This guide will introduce you to what’s involved in putting together a DIY sauna for home use.
Table of contents
This DIY home sauna guide will provide you with real life tips, tricks and information on how to design and build your own a sauna from scratch. It will also give you the low down on all the constituent parts you’ll need to consider during the build process.
Example: You may want to consider frameless glass doors and panels
Alternatively, a DIY home sauna kit is often a great way for any wellness enthusiast to keep costs down. DIY sauna kits provide the great pleasure that comes from constructing your own project. The end result will be all the benefits that come from sauna bathing.
We can supply you with everything you need to make your own sauna. Plus expert advice is just a phone call away should you need any advice choosing what’s best.
What should you consider when you build your own sauna at home?
There a whole host of considerations when designing and building a DIY sauna kit for installation in your home. We have outlined the primary considerations, but your individual design will be different.
It is essential to consider several key components to ensure that the sauna is safe, functional, and enjoyable. Here are some components to consider when building a home sauna:
- Location: The first thing to consider when building a sauna is where it will be located. The sauna should be located in a dry, well-ventilated area that is easily accessible. The location should also have a dedicated electrical circuit to power the sauna’s heater and lighting.
- Size: The size of the sauna will depend on how many people will be using it at once. A typical home sauna can accommodate between two to six people.
- Walls and ceiling: The walls and ceiling of the sauna should be made of moisture-resistant materials, such as cedar, hemlock, or spruce. These materials are durable and have natural oils that resist bacteria and fungus.
- Flooring: The flooring of the sauna should be slip-resistant and easy to clean. Materials such as cedar or tile work well in a sauna.
- Heater: The sauna’s heater is the heart of the sauna, and it is crucial to choose a high-quality, reliable heater. The heater should be sized appropriately for the sauna’s size and should be UL-listed.
- Ventilation: Proper ventilation is crucial in a sauna to prevent the build up of carbon monoxide and other harmful gases. The sauna should have a vent installed at the ceiling to allow fresh air to circulate.
- Lighting: The sauna should have low-level lighting to create a relaxing atmosphere. The lighting should be moisture-resistant and easy to clean.
- Seating: The sauna should have comfortable seating that is designed to withstand high temperatures. Cedar benches are a popular choice for sauna seating.
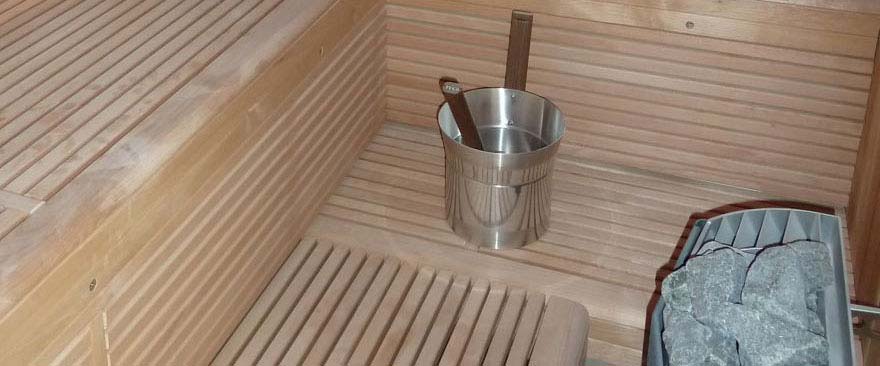
- Accessories: There are several accessories that can enhance the sauna experience, including a thermometer, hygrometer, and sand timer. A bucket and ladle for pouring water on the sauna rocks are also necessary.
- Safety: Safety is paramount when building a sauna. The sauna should have a sturdy door with a handle that is easy to operate from the inside. It is also essential to have a thermometer to monitor the sauna’s temperature and to never exceed the sauna’s maximum temperature.
Space and location planning
Proper planning is key to any DIY project whether it’s building a garden shed or a sauna. You will need to consider where and how much space you have available. For example, the minimum ceiling height of your DIY home sauna needs to be at least 1900mm for safety reasons. You’ll also need to prepare the site before you do anything.
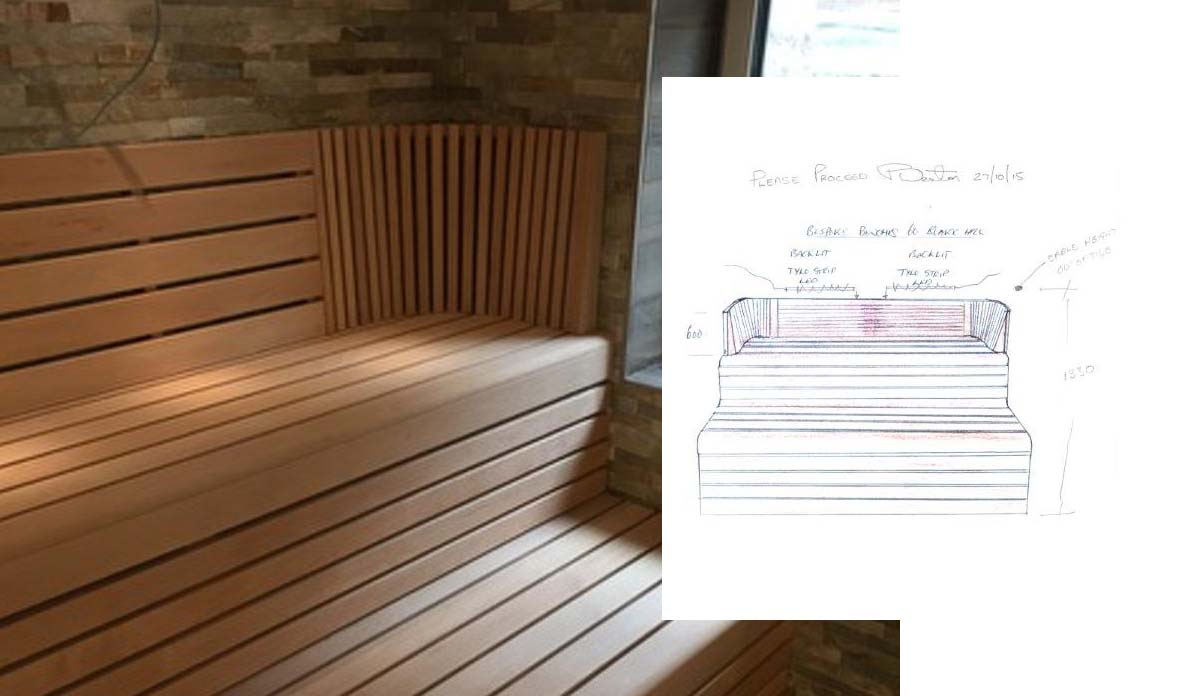
Example: Mock-up sketch of sauna design and finished build.
This is for a clear height over the sauna heater, especially with angled ceilings. If the ceiling is any lower the risk of fire increases. It is also a good idea to have bathroom facilities fairly close by. Although not necessary, many people choose a spare bedroom or the loft.
If you’re planning on building your own sauna against a ‘cold’ wall it’s a good idea to leave a gap between the wall and your sauna insulation. This will help prevent any condensation building up over time.
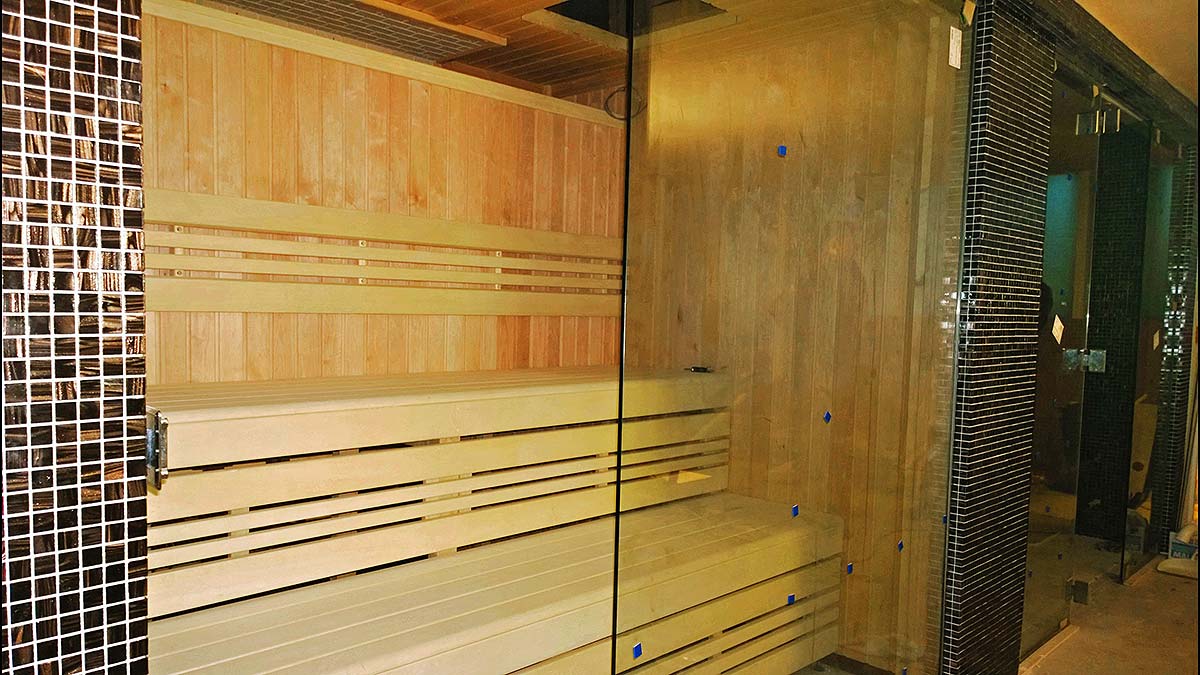
Wood panelling for the walls and ceiling
For many people looking to build their own sauna the obvious choice for materials is traditional wood panelling. This is accepted as being the best choice for both interior and exterior. There are many woods available but the main choices are spruce, cedar, aspen and alder.
Example: Cedar is a popular wood for building your own sauna
In the past traditional saunas were made from solid wood logs which provided all the thermal insulation you needed for the sauna room. Nowadays it’s often not that easy to create a DIY home sauna in the same way so thermally insulated sauna panelling has taken its place.
Each type of wood has its own distinctive aroma which adds a huge amount to the overall sauna experience so choose carefully. You may prefer a stone interior for an ancient ambience. If you wish to use stone you need to understand your sauna will take much longer to heat.
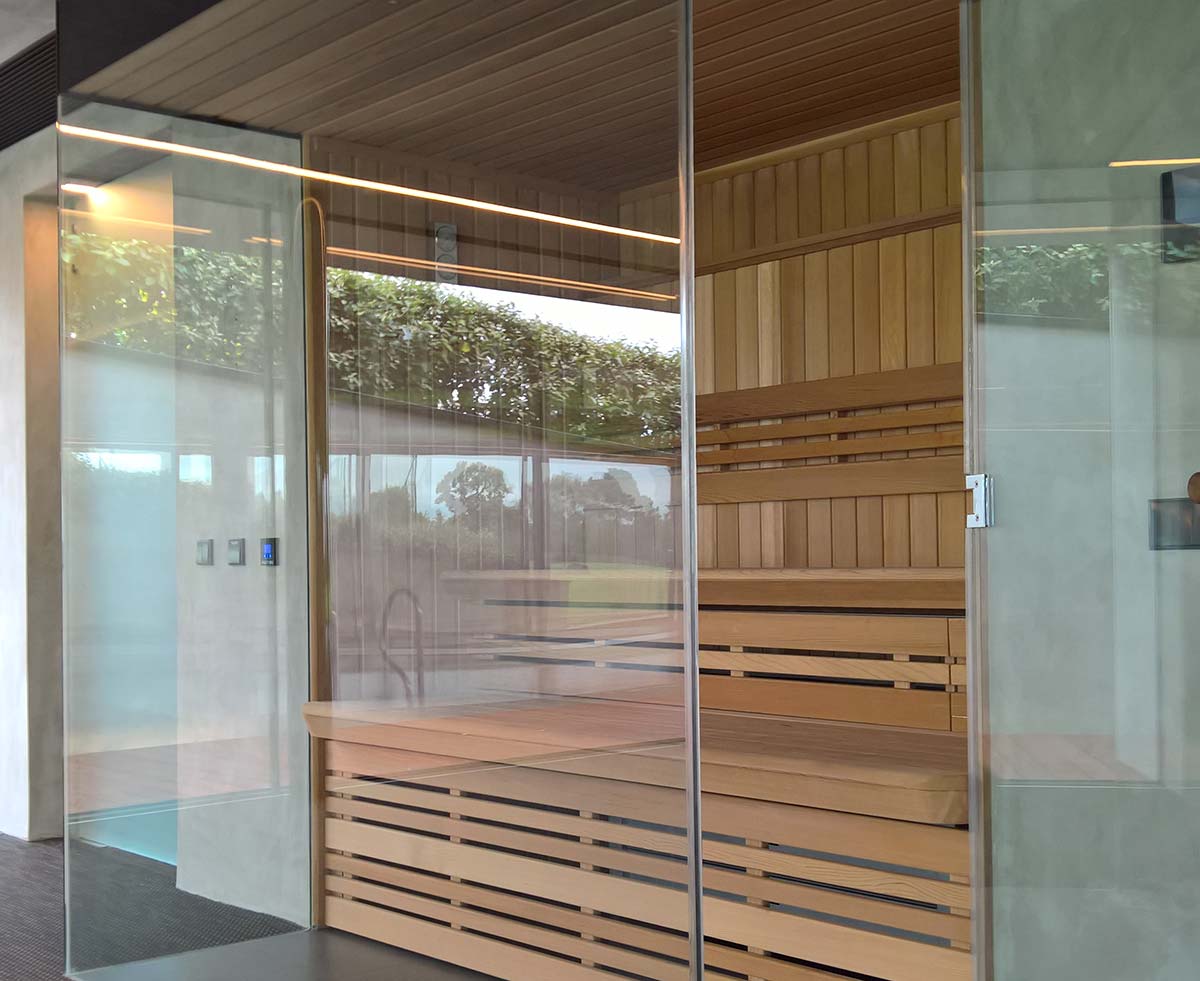
Sauna doors and glass panels
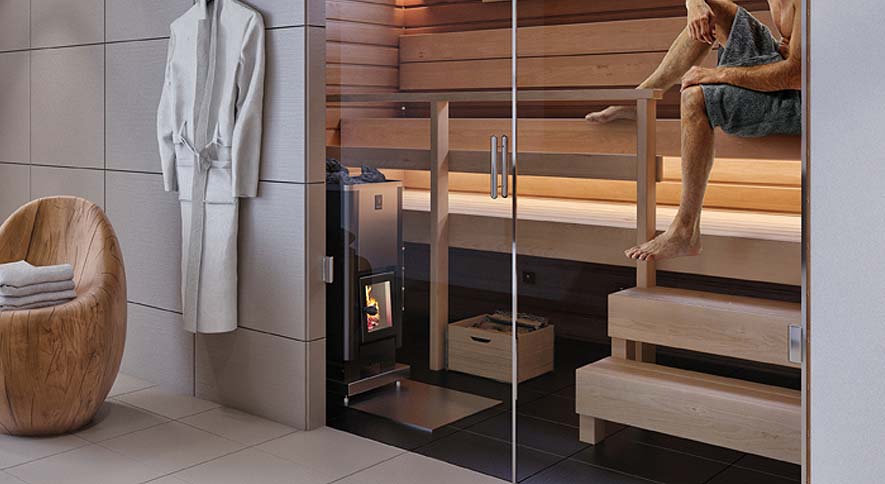
When designing your sauna you will need to consider factors such as privacy and aesthetics. Some DIY enthusiasts like to build a closed wooden sauna with a small window in the door. As long as you have the privacy it is very popular to build your own sauna with a glass front.
Example: Interior view of a home sauna design with frameless glass doors
Glass front saunas are usually made up of a frameless glass door and a number of glass panels. For safety, sauna doors generally open outwards and shut using a magnetic strip or self-closing hinges. This ensures it can never jam or become impossible for someone to open.
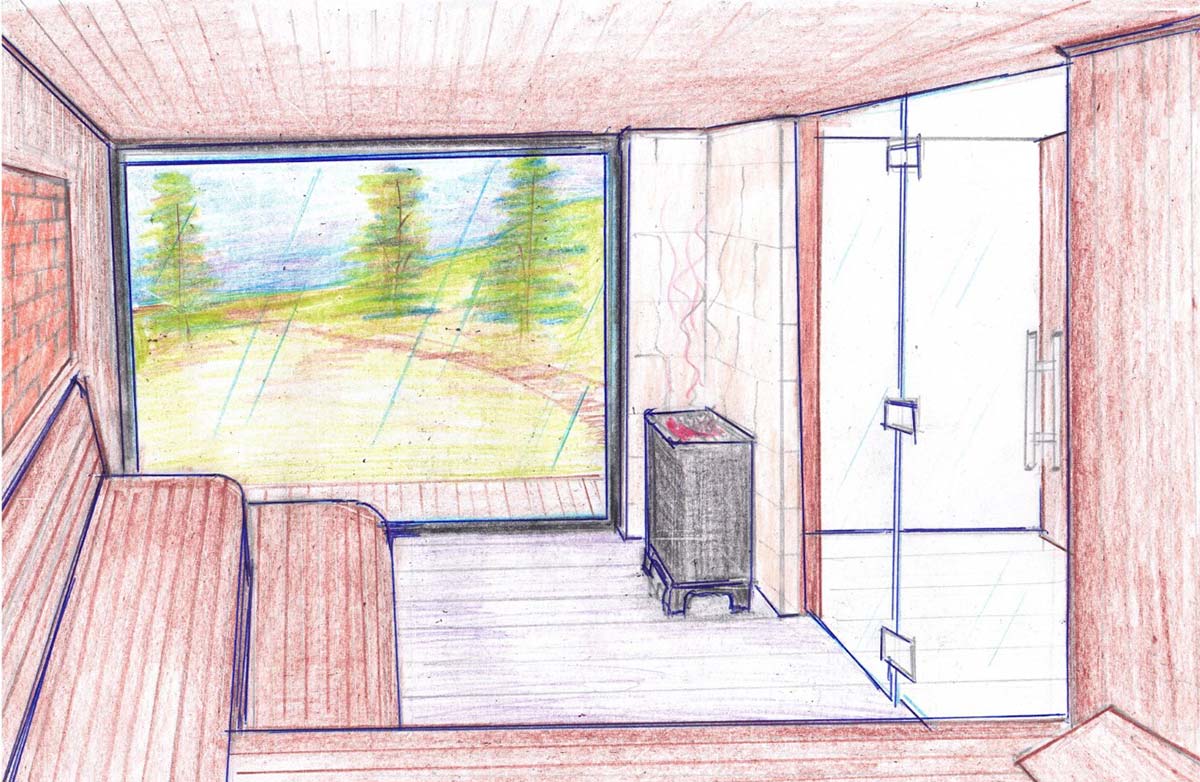
Choosing the correct type of sauna heater
There are various types of sauna heaters available such as the traditional wood fired sauna heaters or the more modern electric versions. If you’re thinking of installing a wood burning sauna heater you will need ventilation and a dedicated chimney.
Example: Whilst expensive, traditional wood burning sauna heaters are popular
The size of your sauna will determine the sauna heater best suited to heat the room. Generally, the rule for wooden saunas is 1kW for each 1.3 cubic metres of space. If your interior is lined with large areas of glass, tiles, stone or other dense materials it’s a good idea to use a heater that has a higher output.
Interiors, benches, backrests and skirting
If you’re building a home sauna for more than one person or even just for yourself you’re going to need somewhere to rest. Whilst it is not necessary, most enthusiasts like to have somewhere to lie down as well as sit. A good quality bench, backrest and headrest will make your bathing experience all the more invigorating.
Example: Benches, backrests, headrest and skirting make up the sauna interior
There are various types of wooden benches and backrests available. Choose from different slatted designs and differing woods. Each type and style contributes towards the character of your DIY home sauna and can accommodate varying numbers of bathers.
For extra safety, comfort and aesthetics you might want to think about adding downward skirting to your sauna benches. You can also pick up a complete sauna interior which can be cut to size.
Ventilating your home sauna
When thinking about ventilating your sauna it’s a good idea to keep it simple. Where possible use the ‘natural draught’ principle and have both an air inlet and air outlet. You will need to place your air outlet at the top corner of your sauna, diagonally opposite the heater.
For your inlet you will need to place it close to the bottom of your sauna heater. Importantly, both the ventilating inlet and outlet must lead from and into your sauna room.
Controlling your sauna room
For complete control and perfect ambience you can also install a control panel with your DIY sauna. For example the Tylo H1 electronic control panel allows you to programme your sauna to be ready for up to 24 hours in advance.
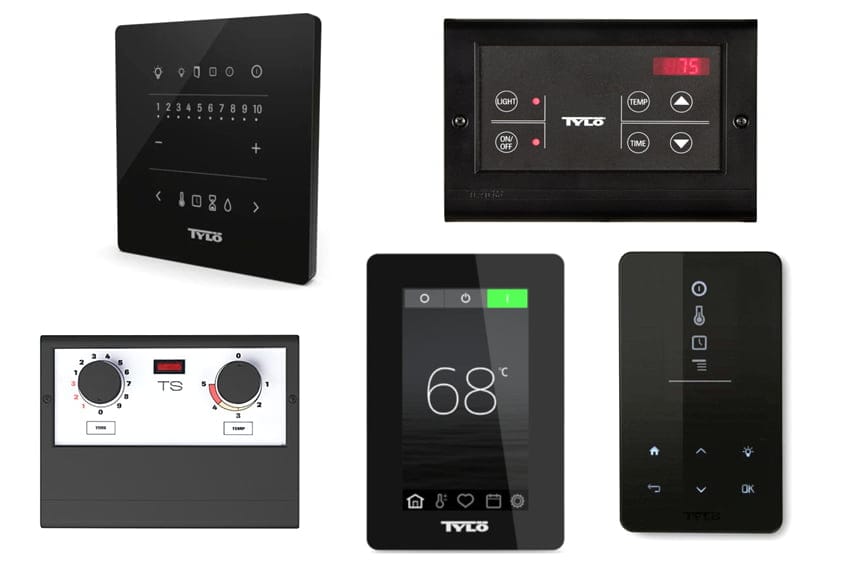
Example: There are many control panels for your DIY home sauna
Additionally, the Tylo Elite Cloud is a top quality control panel with touch screen control, multiple languages and temperature displays, 24 hour clock and can regulate all aspects of your sauna.
Lighting and chromatherapy treatments
There are a whole host of lighting systems for sauna bathing from simple wooden lampshades to spotlights and optical fibre lighting. Choice of lighting is a major aspect of creating the perfect ambience for sauna bathing. This is such a large part of the overall sauna experience that it has grown into an industry all of its own called Chromatherapy.
Whether you want a few lights for a softly lit sauna or the complete chromatherapy experience with colour changing optical fibre starry skies we can supply them all.
Frequently asked questions
Can you make your own sauna?
Yes, it is possible to make your own sauna. You can either build one from scratch or purchase a pre-made sauna kit. Building a sauna can be a rewarding project, and it allows you to customize the design to your liking.
How much does it cost to build a DIY sauna?
The cost of building a DIY sauna can vary depending on the materials you choose, the size of the sauna, and the complexity of the design. A simple, budget-friendly sauna can cost a few hundred pounds or less, while a more elaborate sauna can cost several thousand pounds.
How to build a cheap homemade sauna?
To build a cheap homemade sauna, you can use budget-friendly materials such as cedarwood, pine, or aspen. You can also use reclaimed materials to save money. Additionally, you can opt for a simple design and forgo any unnecessary features like a separate changing room or fancy lighting.
What is the cheapest way to use a sauna?
The cheapest way to use a sauna is to use a sauna at a public facility or gym. You can also build your own sauna and use it sparingly to minimise electricity usage.
Can you build your own sauna UK?
Yes, you can build your own sauna in the UK, but you will need to follow local building regulations and obtain any necessary permits or planning permission.
Do indoor saunas need to be vented?
Yes, indoor saunas need to be vented to remove excess heat and moisture. A proper ventilation system is necessary to maintain a safe and comfortable environment.
How hard is it to build your own sauna?
Building your own sauna can be a challenging project, especially if you have limited carpentry skills or experience with electrical wiring. However, with the right tools, materials, and guidance, it is possible to build a sauna on your own.
Do I need permission to build a sauna?
In most cases, you will need to obtain planning permission before building a sauna in your home. The exact requirements vary depending on your location and the size and type of sauna you plan to build.
Is it better to build or buy a sauna?
Whether it is better to build or buy a sauna depends on your budget, DIY skills, and personal preferences. Building your own sauna allows you to customise the design and potentially save money, but it requires more time and effort. Buying a pre-made sauna is typically faster and easier, but it can be more expensive.
What do you need to build a sauna in your home?
To build a sauna in your home, you will need a suitable location, such as a spare room or basement, as well as materials such as wood, insulation, and a sauna heater. You will also need basic carpentry skills and potentially some electrical knowledge to wire the sauna heater. Additionally, you will need to install a ventilation system to remove excess heat and moisture.